DIY 12V camper electrical system: the project for my Mitsubishi Delica L300
A 200 Ah LiFePO4 battery, a 200 W solar panel, Victron components and the complete diagram: how I built the electrical system for travelling independently.
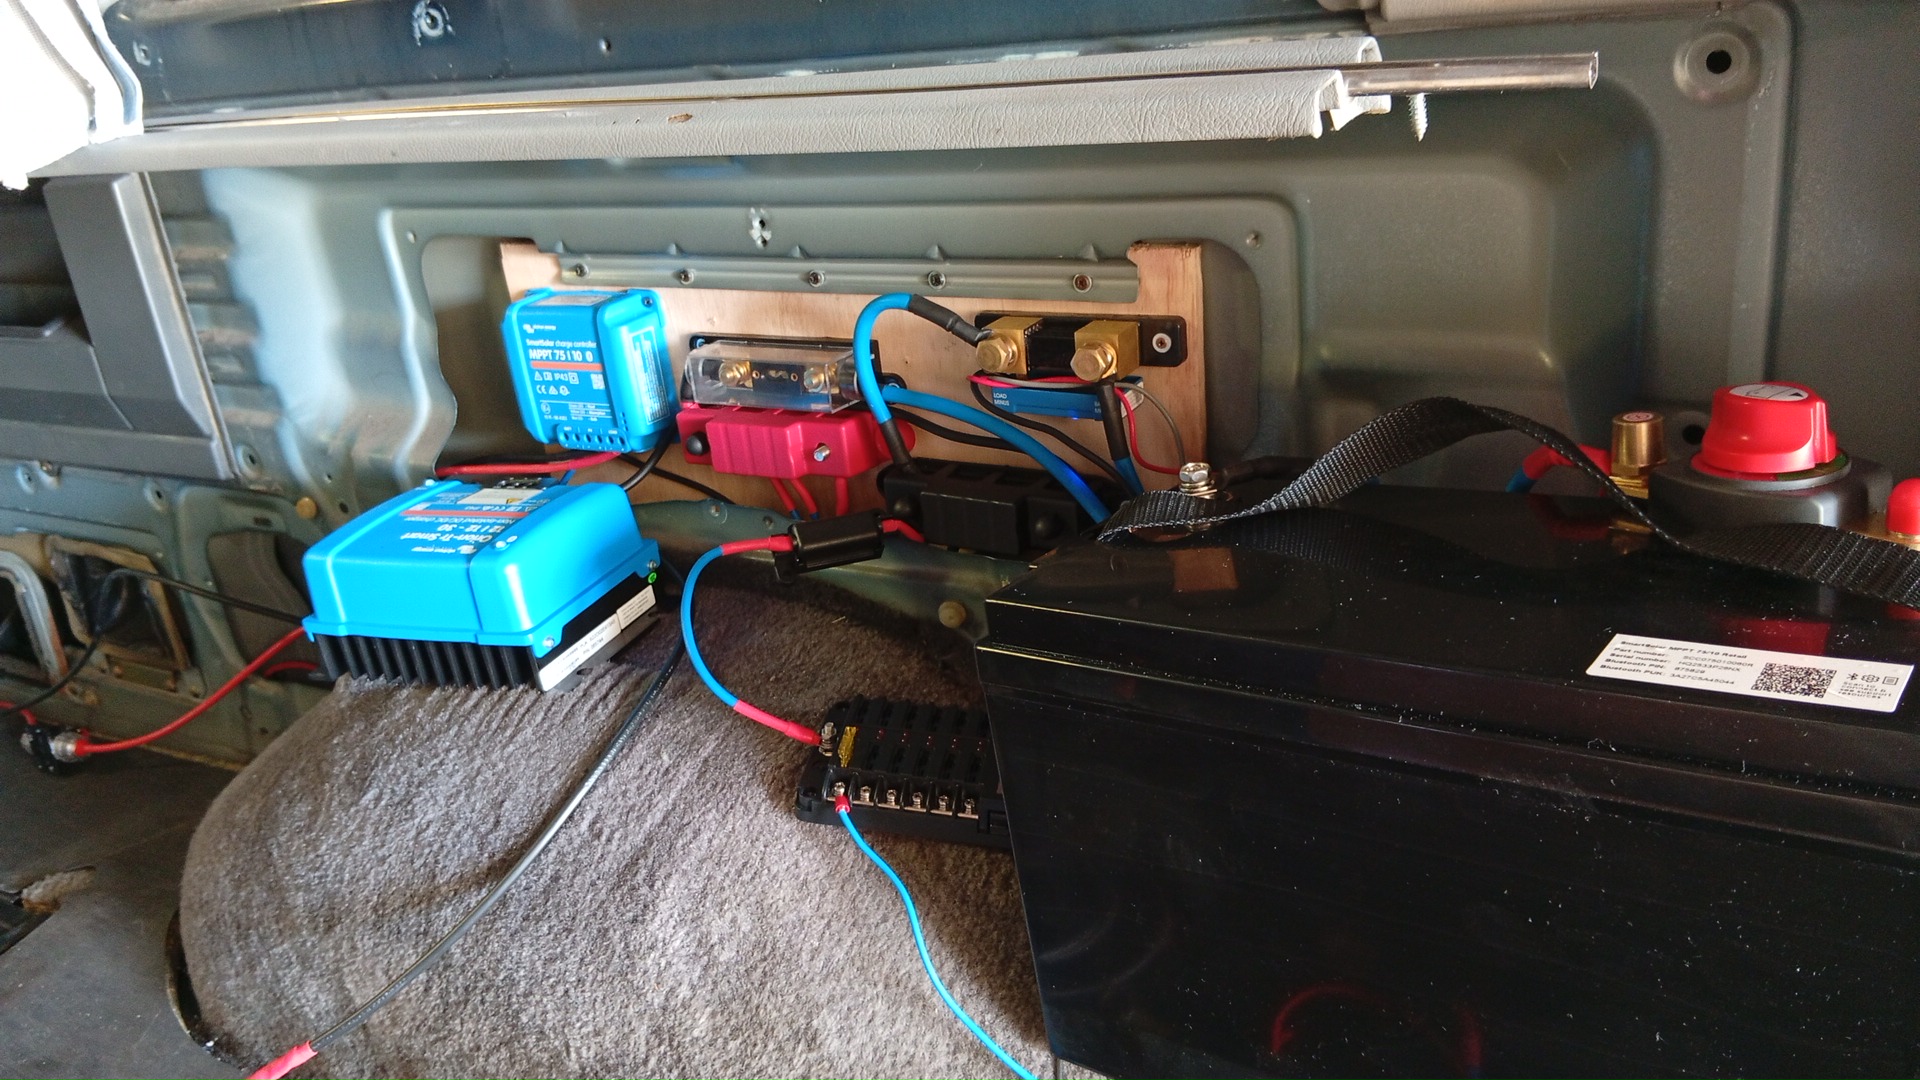
- System
- 12V
- Battery
- LiFePO4 200 Ah
- Capacity
- ≈ 2.56 kWh
- Solar
- 200W HPBC 36V
Contents
When I started converting my Mitsubishi Delica L300 4x4, one of my priorities was building an electrical system that would let me travel independently, even for several days away from campsites and power outlets.
The goal was to build a simple, robust and reliable system capable of powering the fridge, diesel heater, lighting, water pump and all the small devices I need while travelling.
So I decided to design and install a 12V camper electrical system myself, mainly using Victron Energy components and a 200 Ah LiFePO4 lithium battery.
In this first article I am sharing an overview of the project, the components I used and the system diagram. In the next ones I will cover the charging systems, connections and real-world consumption in more detail.
How I organised the electrical system
The heart of the system is a 200 Ah LiFePO4 leisure battery, with a nominal energy capacity of approximately 2.56 kWh.
I chose this capacity to have good autonomy during stops, without having to start the engine repeatedly or rely on external power sources.
The battery can currently be charged in two ways:
- 200W HPBC 36V solar panel, installed on the Delica's roof and connected to a Victron SmartSolar MPPT 75/10 charge controller. I did not buy the panel and the controller separately: they are part of the Kit Solare Camper 200W HPBC 36V con MPPT I purchased from Il Portale del Sole, together with the mounting brackets, the cable gland, a 5 m 4 mm² extension cable and the Votronic paralleler for the engine battery.
- Vehicle alternator, through a Victron Orion 12/12-30A DC-DC charger, which manages leisure battery charging while driving.
To monitor the system I also installed a Victron SmartShunt 500A, which lets me check the battery's estimated state of charge, current and consumption from my smartphone.
I chose a ready-made kit because it gave me everything needed to mount and wire the panel in a single box, with its own wiring diagram and installation manual. The panel is a 200 Wp HPBC monocrystalline 36V module, measuring 118 × 77 × 3 cm and weighing 9.89 kg: the higher working voltage compared with a classic 12V module means lower currents at the same power, and therefore smaller losses along the cables.
All the components in my system
These are the main components I used to build the Delica's electrical system, with their purchase links.
| Component | Model | Link |
|---|---|---|
| Leisure battery | LiFePO4 12V 200 Ah | View on Amazon |
| Solar kit | Kit Solare Camper 200W HPBC 36V con MPPT | View on Il Portale del Sole |
| Solar panel | 200W HPBC 36V all-black, 118 × 77 × 3 cm (from the kit) | View in the kit |
| Solar charge controller | Victron SmartSolar MPPT 75/10 (from the kit) | View in the kit |
| Panel mounting and wiring | 4 angle brackets + 2 straight ones, cable gland, 5 m 4 mm² extension (from the kit) | View in the kit |
| Paralleler | Votronic 12V for the engine battery (from the kit) | View in the kit |
| DC-DC charger | Victron Orion 12/12-30A | View on Amazon |
| Battery monitor | Victron SmartShunt 500A | View on Amazon |
| Distribution busbar | 12V busbar | View on Amazon |
| Fuse holder | 12V fuse holder | View on AliExpress |
| ANL fuses | ANL fuses | View on AliExpress |
Some of these are affiliate links: if you buy through them I may receive a commission, at no additional cost to you. They lead to Amazon searches for the components or equivalent products, or to AliExpress product pages. The link to the solar kit on Il Portale del Sole is not an affiliate link: it is the product I bought. For the battery, panel and accessories, it is important to check the brand, model and specifications before buying.
12V camper electrical diagram: all the connections
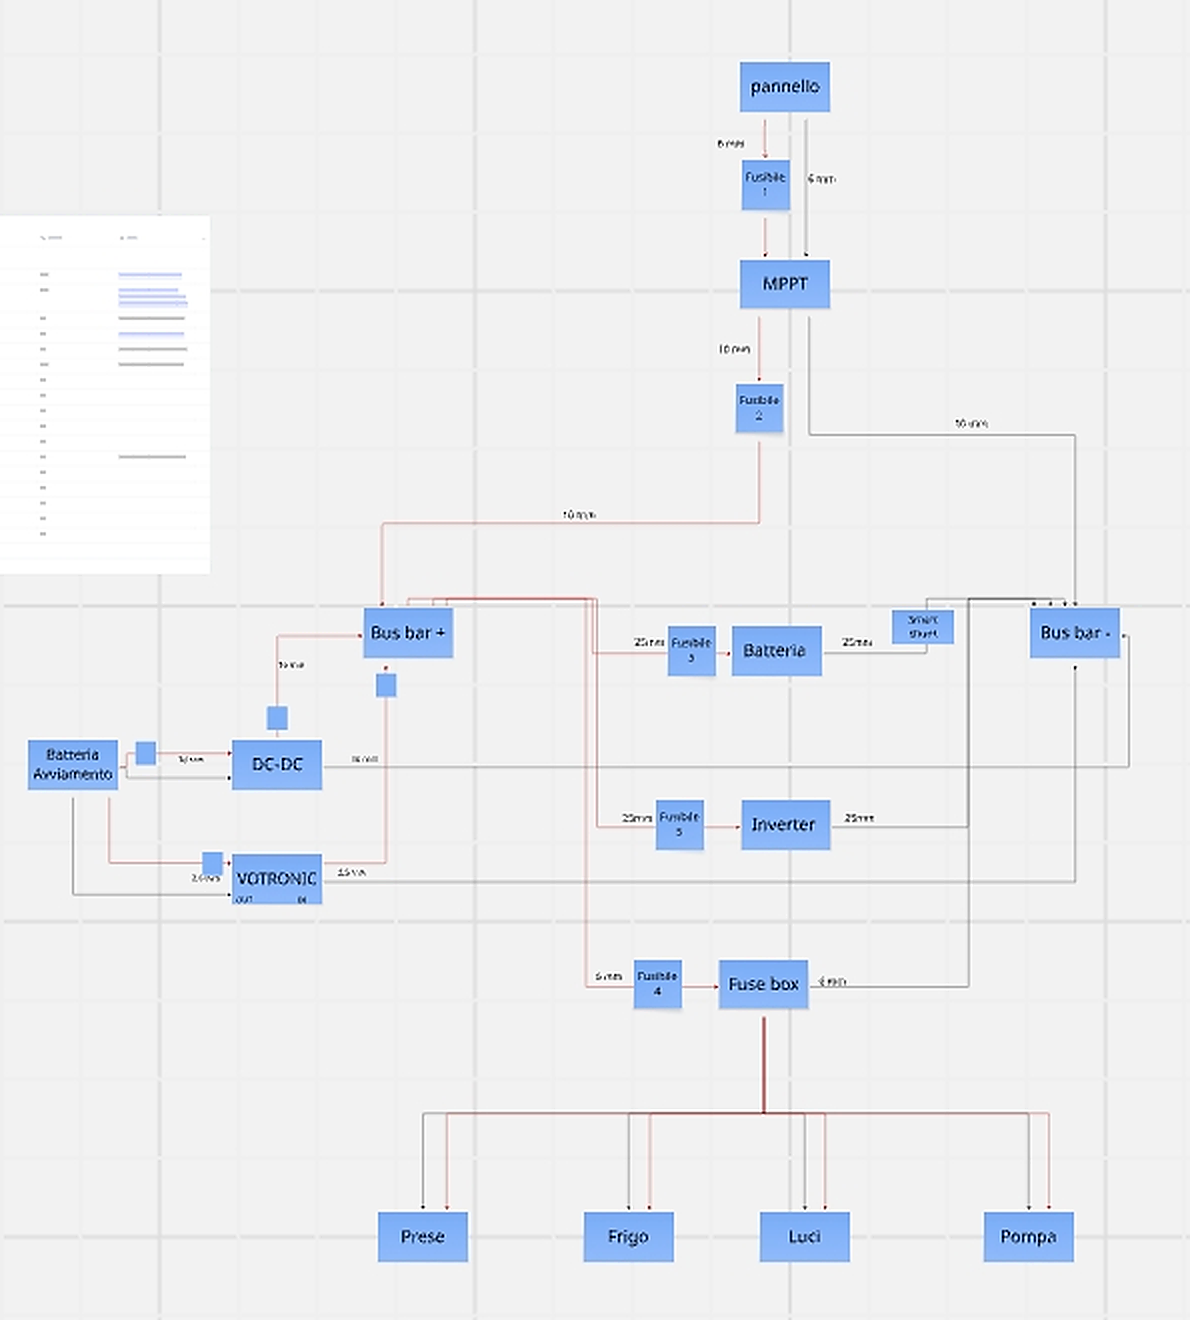
To make the project easier to understand, I created a diagram of my 12V camper electrical system.
The diagram shows the main components and the connections between the solar panel, MPPT controller, leisure battery, DC-DC charger, SmartShunt and load distribution.
I decided to share it because, when I started designing the system, finding a clear and complete diagram was one of the biggest difficulties.
The diagram shows my Delica's configuration and can be a useful reference for understanding how the system works. Cable cross-sections, fuses and protection devices must, however, be sized and checked for each installation.
A system ready for future upgrades
From the beginning I wanted to build a modular system that I could expand over time.
The main loads currently run at 12V, so I have not yet installed an inverter or a 230V mains charging system.
However, I have prepared the system so that I can add an inverter of around 500W and a Victron Blue Smart IP22 charger in the future, together with an external socket and the necessary protection devices.
This lets me keep the system simple today without giving up possible improvements.
The next articles
This is just the starting point. In the next articles I will show in more detail how I built the system:
- How to charge a camper leisure battery: solar panel, MPPT and DC-DC.
- Camper electrical connections: cables, fuses, busbars and 12V distribution.
- Camper consumption and autonomy: how long the 200 Ah LiFePO4 battery lasts and how much the solar panel produces.
The goal is to share a real project, with the solutions I adopted and the problems I encountered, to help anyone who wants to build a reliable DIY camper electrical system suited to off-grid travel.
- #impianto elettrico camper 12V
- #Impianto elettrico camper fai da te
- #schema elettrico camper 12V
- #batteria LiFePO4 camper
- #pannello solare camper 200W
- #camperizzazione Delica L300